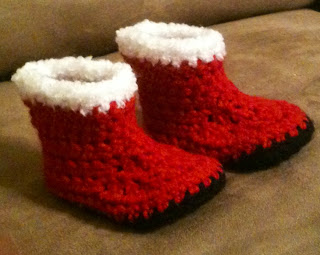
I made this sweet little hat as part of a set for our 3 month old nephew to wear in his Christmas pictures.
Here is my pattern:
Santa Aviator Hat
I used red worsted weight yarn (I Love This Yarn! from Hobby Lobby) and an H hook. The trim is fluffy white baby yarn worked with 2 strands held together. This pattern is mainly worked in rounds. A specific gauge is not important as long as you measure along the way.
First, let's make the crown. This will be the flat disk at the top of the hat that determines the actual size. We will work in rounds, increasing until we get the size we want.
A note on size: I made this hat to fit my 3 month old nephew. His head measures about 17 inches. To adjust the size for a larger or smaller head, simple add more increase rounds until the circle is the right size. In case you forgot your geometry classes: you can measure across the circle (diameter) and multiply it by 3.14 (pi) to get the circumference of the circle. At Round 5, my circle was about 5 inches. 5 x 3.14 = 15.7 inches around. These types of hats stretch, so it is good for them to be 1 to 1 1/2 inches smaller than the actual head measurement. Trying to guess what size to make? Here is a
great resource for measurements.
Working in Red
Round 1: Starting with a magic circle, work 8 DC. Slip stitch to close the ring. Tighten up the circle.
Round 2: Chain 2, then DC Increase (2 DC in on stitch) all the way around. Slip stitch to join. (16 stitches). Note: I count the Chain 2 as the first DC.
Round 3: Chain 2, then *1 DC Increase, 1 DC* Repeat all the way around. Slip stitch to join (24 stitches).
Round 4: Chain 2, then *1 DC Increase, 2 DC* Repeat all the way around. Slip stitch to join (32 stitches).
Round 5: Chain 2, then *1 DC Increase, 3 DC* Repeat all the way around. Slip stitch to join (40 stitches). Gauge: At this point, my piece measured about 5 inches.
Now it is time to add the height of the hat.
Round 6-10: Chain 2, then 1 DC in each stitch all the way around. Slip stitch to join. (40 stitches). Note: You can adjust the height of the hat by adding or omitting rows in this section.
Earflaps
Row 1: Starting from where you left off with the rounds, Chain 2, then 7 DC. (8 stitches)
Row 2: Chain 2, DC2TOG (Decrease), 3 DC, DC2TOG
Row 3: Chain 2, DC2TOG, 1 DC, DC2TOG
Finish off and cut the yarn. Don't worry about working in the tail as we can crochet over it when we add the trim.
To add the second flap, skip over 24 stitches from the first flap and attach your yarn. Repeat the steps for the first earflap.
Now for the front flap and the trim.
Row 1: Working in white, attach your yarn 1 stitch away from the earflap and DC across ending 1 stitch before the other earflap.
Row 2-3: Chain 2, DC across
Finish off and weave in tail.
For the trim, attach next to the front flap and work HDC all the way around the edge. You may find it necessary to add stitches in the corners to make the trim lay properly.
Add the strings.
Cut several lengths of yarn and thread them through the center of the bottom edge of the ear flaps, then braid or twist them into one cord. Tie them off and add pompoms at the end, if desired.
Attach the buttons on the flap to hold it up.


